


Vintage Map Geo Wallpaper
We add a total 5 cm (2 in) safety margin to the width and height for a perfect fit.


3 POSITION YOUR DESIGN
Drag the design left, right, up or down. The shaded area will not be printed.

We review your confirmed design, wall dimensions, crop, image resolution, and panel layout before printing. Want to preview the result first? Use our wallpaper mockup service to see how your chosen design will look on your wall before printing.

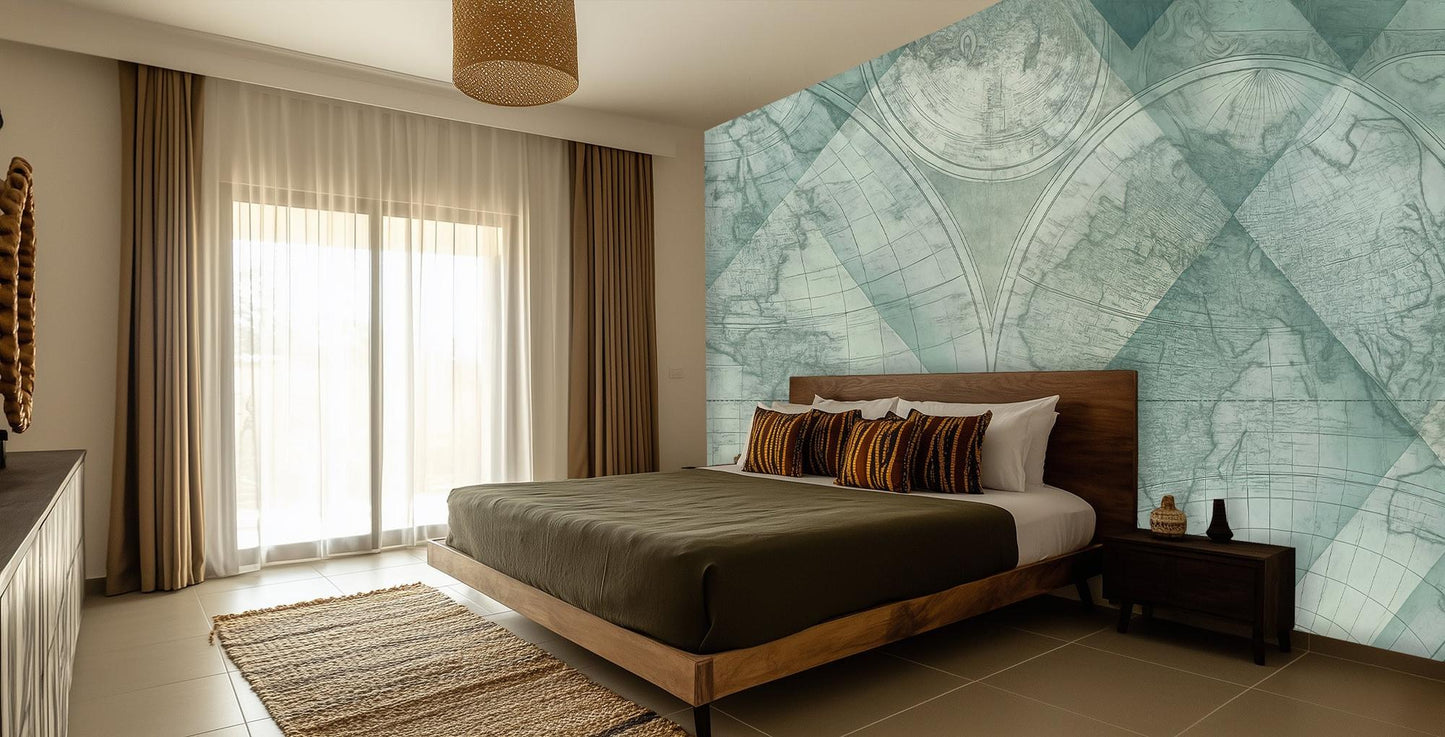
Wallpapers inspired by vintage cartography enhance spaces with a unique blend of history and artistry. This design showcases intricate continental outlines in muted green tones, layered on a soft, textured background that conveys a sense of depth and exploration. The geometric diamond composition creates a sophisticated rhythm, each shape leading the eye across the wall while the delicate details evoke curiosity and reflection.
Cartographic Inspired Design with Depth and Texture
The unique arrangement of cartographic elements in this wallpaper establishes a visually intriguing effect across expansive walls. The geometric patterns interlace with the finely detailed maps, blending history and modern aesthetics seamlessly. The tonal variety—soft greens against slightly darker hues—adds visual interest without overwhelming the senses, making the wallpaper adaptable to various design styles. A discerning eye will appreciate the layers and forms that work collectively to create an engaging wall surface that captures attention in any setting.
Ideal Statement Wall for Sophisticated Spaces
With its captivating visual narrative, this wallpaper suits bathrooms or home offices looking for a refined statement wall. The soothing green palette brings a sense of calm and sophistication, complementing neutral tones in modern settings. By enveloping walls in this design, you introduce an element of depth and intellectual charm that invites conversation and enriches the overall atmosphere.
Transform your space with custom wallpaper murals! It’s simple and convenient – just input your wall dimensions, select your desired paper type, and instantly receive a quote. Our easy ordering process allows you to preview your mural and make any necessary adjustments before finalizing your purchase.
Want to customize the design further or adjust the colors? No problem! Reach out to our team at info@xwallx.com with your specific requests, and one of our designers will respond within 24 hours to assist you with any changes.
Free worldwide shipping is included for wallpaper and wall mural orders.
Estimated delivery is 3–10 days after order confirmation, depending on destination, carrier, customs processing, and local delivery conditions.
Taxes and standard import charges are covered where applicable unless a different condition is clearly shown at checkout.
Tracking information is provided when your order has been handed to the carrier.
If you encounter any issues with checkout or shipping, contact us at info@xwallx.com.
Step-by-Step Installation – Overlap & Double Cut Method
1. Apply Adhesive (For Non-Adhesive Wallpaper/Murals). Spread paste evenly across the area slightly wider than your first panel’s width. For peel-and-stick, skip this step and peel the backing to expose the adhesive.
2. Hang the First Panel. Align the first wallpaper or mural panel with your vertical guideline. Make sure there’s a 5cm (2 inches) overhang at the top. Also, allow a small overlap at the wall edges. Smooth from the center outward to remove air bubbles.
3. Hang the Second Panel with Overlap. Apply adhesive as needed for the next panel (or peel backing for self-adhesive). Hang the second panel, overlapping the first by 5cm (2 inches) along the seam. Ensure the design pattern aligns perfectly on the overlap. Smooth down thoroughly, and adjust as needed before adhesive sets.
4. Overlap Corners and Obstacles. For inside corners, overlap mural seams by at least 1/8 inch. For edge corners, overlap by a full inch and trim for a snug fit. Make relief cuts at sockets, windows, doors, and corners. This helps the mural lie flat and keeps the pattern continuous.
5. Double Cut the Overlap. After positioning the panels and letting the glue set, take a straight edge and a sharp utility knife. Cut through both layers in the middle of the overlap, about 2.5 cm (1 inch) from each panel edge. Remove the cut ‘waste’ from both panels, leaving a perfectly matched seam. Press the edge back into place, adding glue if needed.
6. Trim Edges and Finish. Trim excess wallpaper or mural material along the top, bottom, and sides. Use a sharp blade to make it flush with ceilings, baseboards, and corners. Wipe away glue residue immediately with a damp cloth or baby wipe to avoid visible marks.
7. Smooth and Inspect. Work along all seams with your smoothing tool to remove any bubbles and ensure tight bonding. Adjust any misalignment before adhesive has fully dried. Check all edges and trims for a flawless finish.
To keep your custom wallpaper looking its best, follow these simple care instructions:
1. Cleaning: Gently wipe the surface with a soft, damp cloth. Avoid harsh chemicals or abrasive materials that could damage the finish.
2. Avoid Excess Moisture: Keep your wallpaper dry to prevent peeling or warping. In areas with high humidity, consider using a protective sealant.
By following these easy tips, your custom wallpaper will remain vibrant and beautiful for years to come.
