


Serene Blue Landscape Wallpaper
Enter your exact wall size. We add 2 in (approximately 5 cm) to the total width and total height for edge trimming. Panel seam margins are included separately.


3 POSITION YOUR DESIGN
Drag the design left, right, up or down. The shaded area will not be printed.
Want to preview the result first? Use our wallpaper mockup service to see how your chosen design will look on your wall before printing.

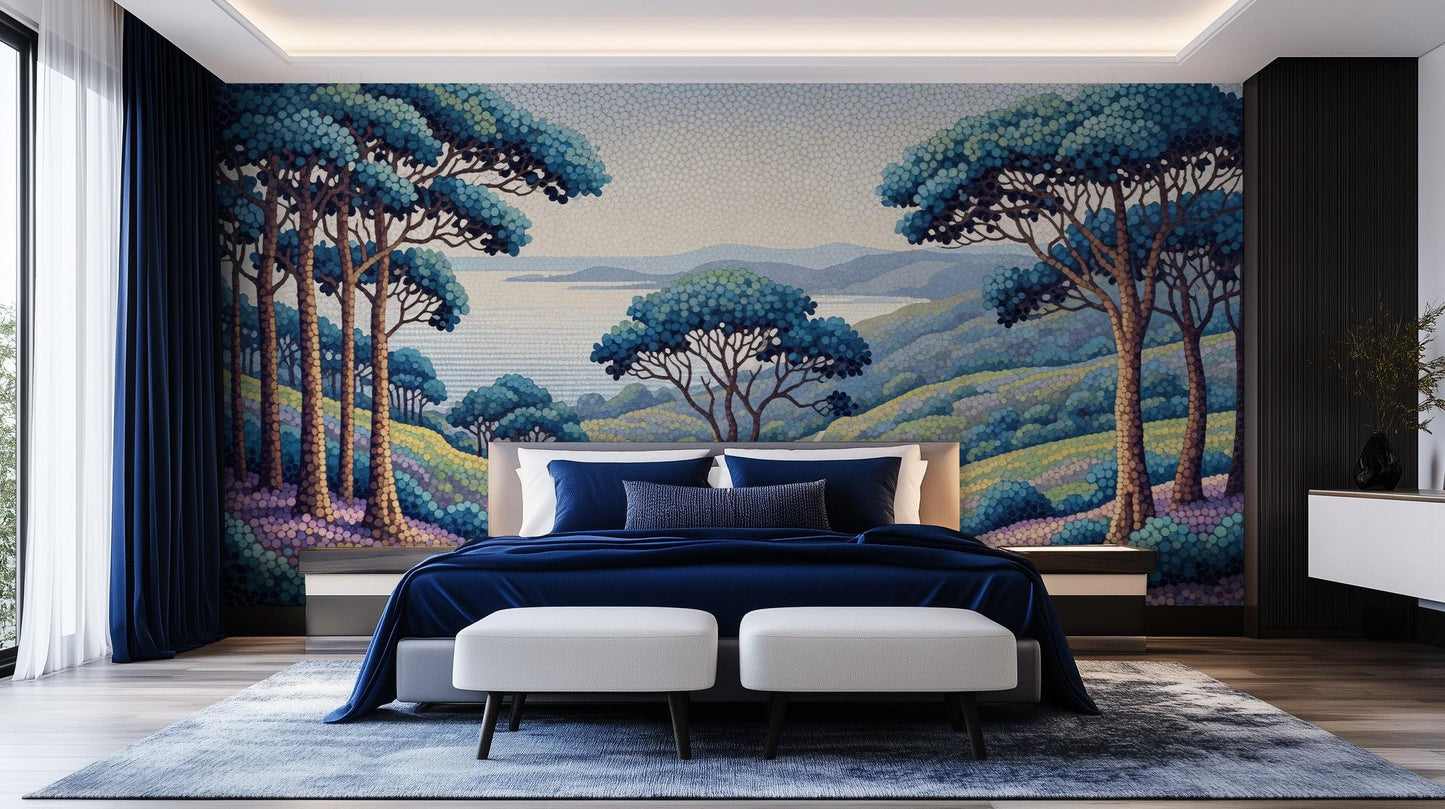
Wallpaper embodies a stunning landscape filled with towering trees set against serene hills, offering a harmonious blend of blue and green hues that evoke a sense of calm. The composition creates a rhythmic visual flow, inviting you into an immersive natural scene.
Serene Landscape Wallpaper with Calming Blue and Green Hues
This wallpaper's layered design incorporates different shades, enhancing depth and perspective across the wall. The gentle movement and spacing create a tranquil atmosphere, making the space feel more expansive and inviting.
Ideal for living areas or personal sanctuaries, this wallpaper transforms your space into a soothing retreat. Its soft tones promote warmth and serenity, allowing for a perfect backdrop to relax and unwind.
Color & Screen Variations
Product images are intended to provide an accurate representation of our designs; however, colors can appear differently between monitors, phones and other screens. Printed color may therefore vary slightly from what you see online.
Print & Color Consistency
We recommend ordering all wallpaper or mural panels needed for your project at the same time. Products are printed to order, therefore, slight color variations can occur between separate print runs. We cannot guarantee an exact color match when additional panels are ordered at a later date.
Samples
When in doubt, order a sample before committing to your full project. Samples are the best way to review the printed color, material and how the product performs on your particular wall.
Final Order Check
Review your wall dimensions, selected material and design crop before adding to cart. For color changes or design edits, email info@xwallx.com. Our team will reply within 24 business hours.
Free worldwide shipping is included for wallpaper and wall mural orders.
Estimated delivery is 3–10 days after order confirmation, including production and transit time. Timing may vary by destination, carrier, customs processing, and local delivery conditions.
Taxes and standard import charges are covered where applicable unless a different condition is clearly shown at checkout.
Tracking information is provided when your order has been handed to the carrier.
If you encounter any issues with checkout or shipping, contact us at info@xwallx.com.
Wall preparation & Installation
Proper surface preparation is important for the best adhesion and finished appearance of our wallpapers and wall murals.
Textured Walls
Our products are designed for smooth, flat surfaces. Wall texture can affect both adhesion and the finished appearance of wallpaper, murals and wall decals.
Step-by-Step Installation – Overlap & Double Cut Method
1. Apply Adhesive (For Non-Adhesive Wallpaper/Murals). Spread paste evenly across the area slightly wider than your first panel’s width. For peel-and-stick, skip this step and peel the backing to expose the adhesive.
2. Hang the First Panel. Align the first panel with your vertical guideline. Distribute the total 2-inch (approximately 5 cm) height allowance between the top and bottom—about 1 inch (2.5 cm) at each when centered. Keep enough excess at both edges to cover uneven ceilings or floors. Smooth from the center outward to remove air bubbles.
3. Hang the Second Panel with Overlap. Apply the next panel using the method for your selected material. Overlap the adjoining panel by 2 inches (approximately 5 cm), matching the duplicated artwork. This seam allowance is supplied separately from the outer-edge trimming allowance. Smooth the panel and check alignment before double-cutting the seam.
4. Overlap Corners and Obstacles. For inside corners, overlap mural seams by at least 1 inch. For edge corners, overlap by a full inch and trim for a snug fit. Make relief cuts at sockets, windows, doors, and corners. This helps the mural lie flat and keeps the pattern continuous.
5. Double Cut the Overlap. After positioning the panels and letting the glue set, take a straight edge and a sharp utility knife. Cut through both layers in the middle of the overlap, about 2.5 cm (1 inch) from each panel edge. Remove the cut ‘waste’ from both panels, leaving a perfectly matched seam. Press the edge back into place, adding glue if needed.
6. Trim Edges and Finish. Trim excess wallpaper or mural material along the top, bottom, and sides. Use a sharp blade to make it flush with ceilings, baseboards, and corners. Wipe away glue residue immediately with a damp cloth or baby wipe to avoid visible marks.
7. Smooth and Inspect. Work along all seams with your smoothing tool to remove any bubbles and ensure tight bonding. Adjust any misalignment before adhesive has fully dried. Check all edges and trims for a flawless finish.
For advanced troubleshooting or visual diagrams, refer directly to our complete step-by-step wallpaper installation guide.
To keep your custom wallpaper looking its best, follow these simple care instructions:
1. Cleaning: Gently wipe the surface with a soft, damp cloth. Avoid harsh chemicals or abrasive materials that could damage the finish.
2. Avoid Excess Moisture: Keep your wallpaper dry to prevent peeling or warping. In areas with high humidity, consider using a protective sealant.
By following these easy tips, your custom wallpaper will remain vibrant and beautiful for years to come.
